42 draw and label tape diagram
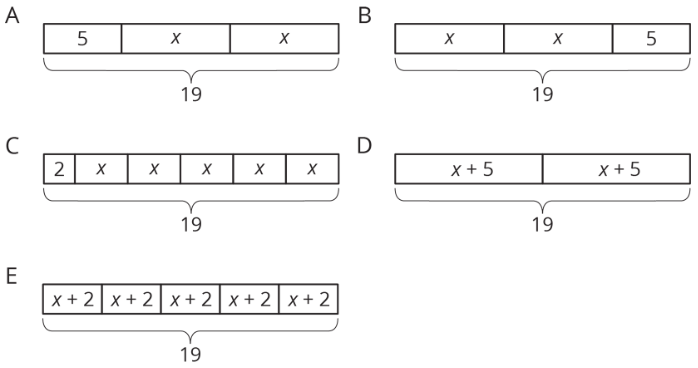
Tape Diagrams | Definition, Examples, Steps, How They Work? Steps in Creating a Tape Diagram. The following are the four easy steps to follow in using a tape diagram to answer mathematical problems. Step 1: Read and analyze the problem. Step 2: Gather information essential for the diagram. Step 3: Draw the tape diagram. Step 4: Solve the problem. Frequently Asked Questions on Tape Diagrams (FAQs) 31.1: Tape Diagrams and Equations - Mathematics LibreTexts Mar 27, 2022 · Exercise 31.1. 5. Diego is trying to find the value of x in 5 ⋅ x = 25. He draws this diagram but is not certain how to proceed. Figure 31.1. 4. Complete the tape diagram so it represents the equation 5 ⋅ x = 35. Find the value of x. Exercise 31.1. 6. Match each equation to one of the two tape diagrams. x + 3 = 9.
Ratios with tape diagrams (practice) | Khan Academy A tape diagram with 2 tapes of unequal lengths. The first tape has 3 equal parts. A curved bracket above the first tape is labeled Cheese pizzas. The second tape has 1 part of the same size as in the first tape. A curved bracket below the second tape is labeled Pepperoni pizzas.
Draw and label tape diagram
How to Creat a Tape diagram | EdrawMax Online - Edrawsoft Step 5: Label the diagram. Solving the given problem will help you check whether your tape diagram is correct or not. To solve the problem, you have to label the diagram and solve the whole mathematical equation using the data provided by your tape diagram. You can use it for simple arithmetic operations or solve various complex problems. 3. What Is a Tape Diagram | EdrawMax Online - Edrawsoft A tape diagram is a rectangular drawing that appears like a tape piece with divisions to support mathematical calculations. It is a graphic tool used commonly in solving ratio-based mathematical word problems. Tape diagrams are visual representations that represent the sections of a ratio by using rectangles. As they are a visual model it takes ... Eureka Math Grade 2 Module 5 Lesson 6 Answer Key Apr 28, 2021 · Eureka Math Grade 2 Module 5 Lesson 6 Problem Set Answer Key. Question 1. Draw and label a tape diagram to show how to simplify the problem. Write the new equation, and then subtract. 220 – 190 = 30. Draw and label a tape diagram to show how to simplify the problem. 220 – 190.
Draw and label tape diagram. Eureka Math Grade 2 Module 5 Lesson 6 Answer Key Apr 28, 2021 · Eureka Math Grade 2 Module 5 Lesson 6 Problem Set Answer Key. Question 1. Draw and label a tape diagram to show how to simplify the problem. Write the new equation, and then subtract. 220 – 190 = 30. Draw and label a tape diagram to show how to simplify the problem. 220 – 190. What Is a Tape Diagram | EdrawMax Online - Edrawsoft A tape diagram is a rectangular drawing that appears like a tape piece with divisions to support mathematical calculations. It is a graphic tool used commonly in solving ratio-based mathematical word problems. Tape diagrams are visual representations that represent the sections of a ratio by using rectangles. As they are a visual model it takes ... How to Creat a Tape diagram | EdrawMax Online - Edrawsoft Step 5: Label the diagram. Solving the given problem will help you check whether your tape diagram is correct or not. To solve the problem, you have to label the diagram and solve the whole mathematical equation using the data provided by your tape diagram. You can use it for simple arithmetic operations or solve various complex problems. 3.
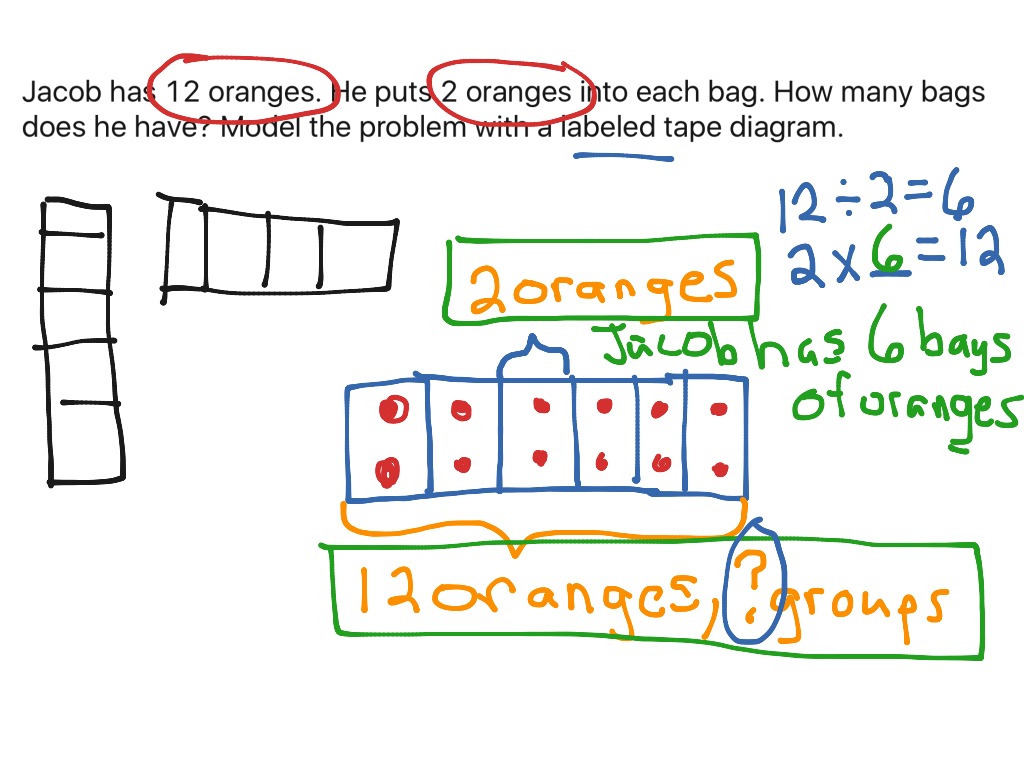
Multiplication/division with a labeled tape diagram | Math ...
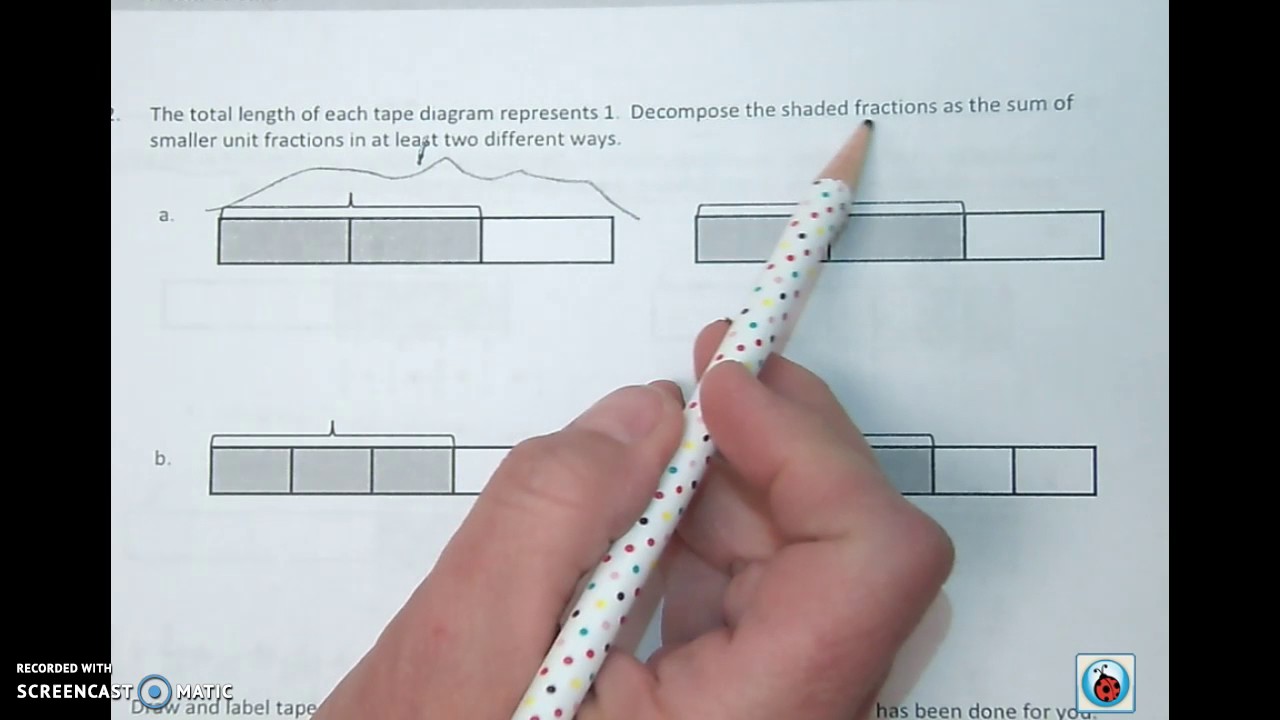
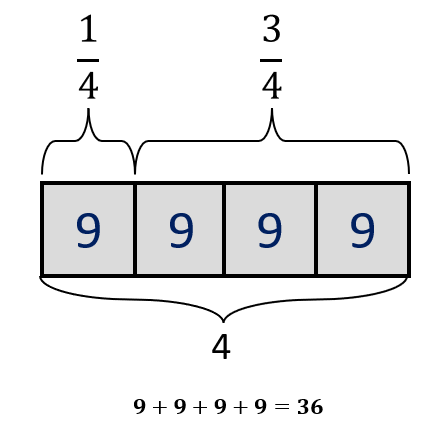
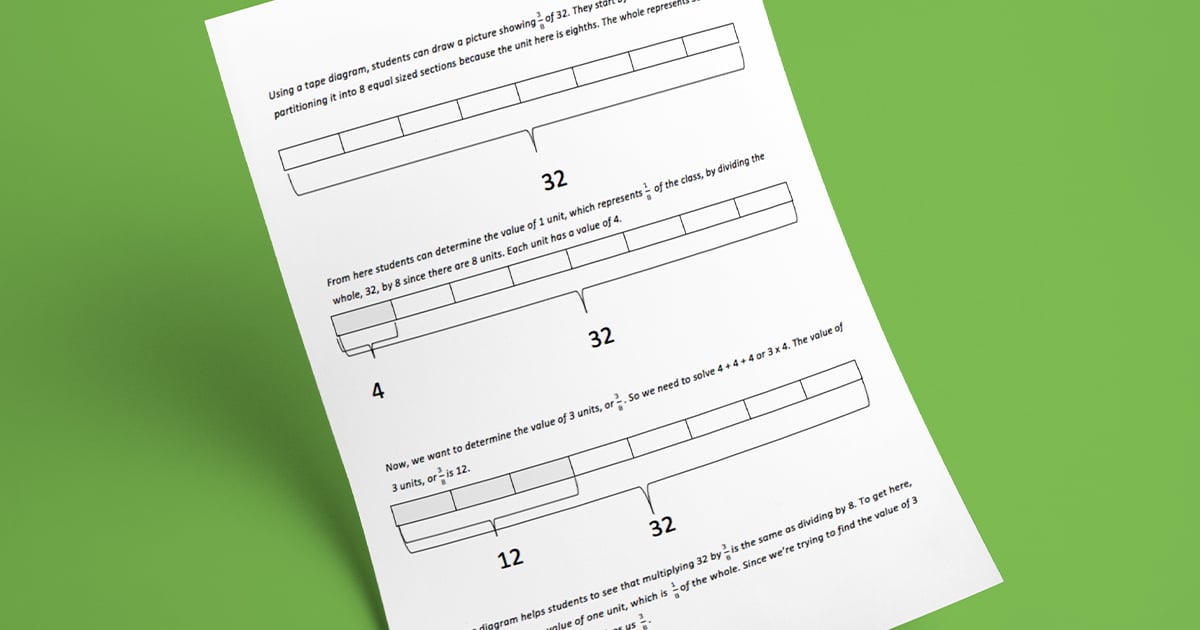
Module 5 Lesson 4 Decompose Fractions using tape diagrams
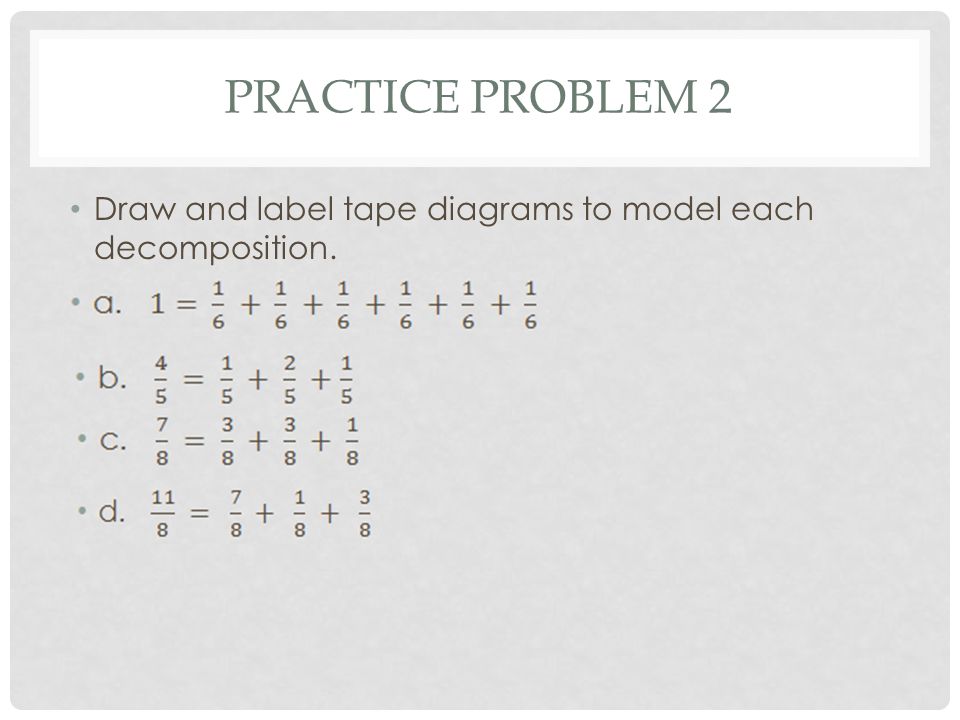
Decomposing Fractions - ppt video online download

Zearn - Double the tape diagrams? They're double the fun ...
Tape Diagrams | Definition, Examples, Steps, How They Work?
Tape Diagrams
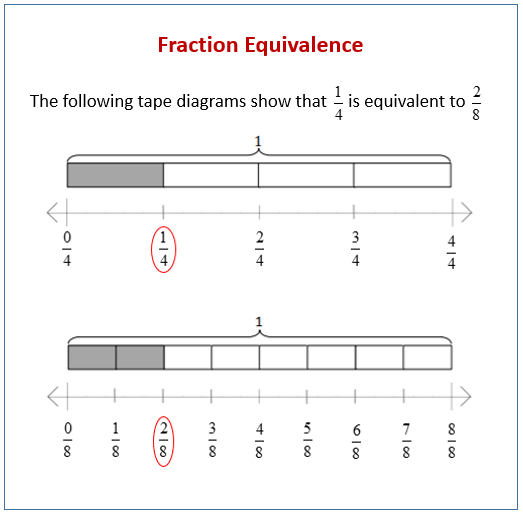
Fraction Equivalence Using a Tape Diagram and the Number Line ...
Tape Diagrams | Definition, Examples, Steps, How They Work?
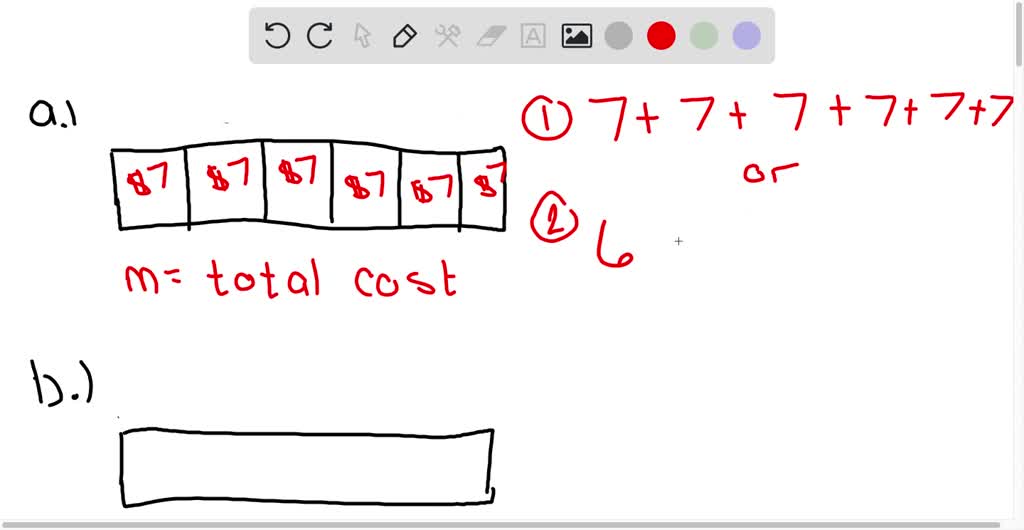
Ari sells 6 boxes of pens at the school store Each box of pens sells for 7 Draw a tape diagram, ad label the total amount of money he makes J5 m; Write an equation; and solve for m., Each box contains ...
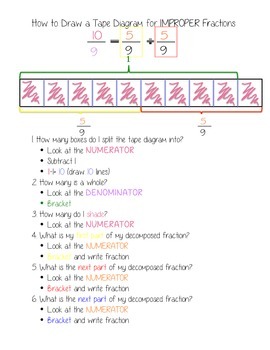
Tape Diagrams and Improper Fractions Visual

Problem 3, Chapter 6: Grade 6 Mathematics: Open Up Resources, Common Core State Standards Edition
Application of the Tape Diagram—A Tool For Problem Solving
Grades 3-5 Math: Using Tape Diagram 3.OA.8, 4.OA.2, 5.NF.3, 5.NF.4a.
Solved] Draw a tape diagram to represent the question: what ...
Unmasking Tape: Diagrams Reveal Underlying Mathematics

How to Use Tape Diagrams in Math for Problem Solving
Solving Word Problems Using Tape Diagrams | by Eureka Math ...
Tape Diagram for Product to Sum – GeoGebra

Reasoning About Context with Tape Diagrams (Part 2) | 7th ...

Rotate tape diagrams vertically (to create bar graphs). - ppt ...
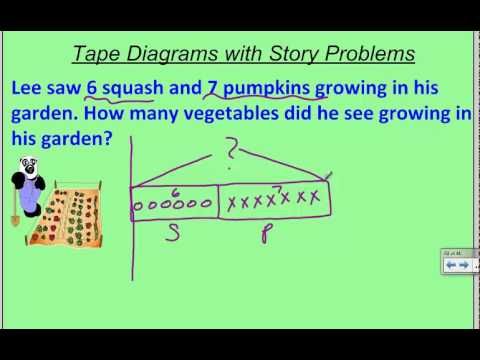
Solving Word Problems Using Tape Diagrams (Part 1)
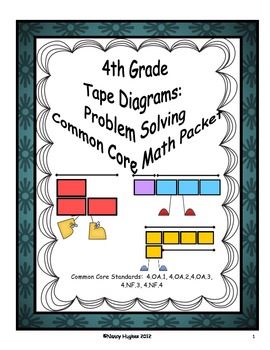
4th Grade Tape Diagrams: Problem Solving Common Core Packet
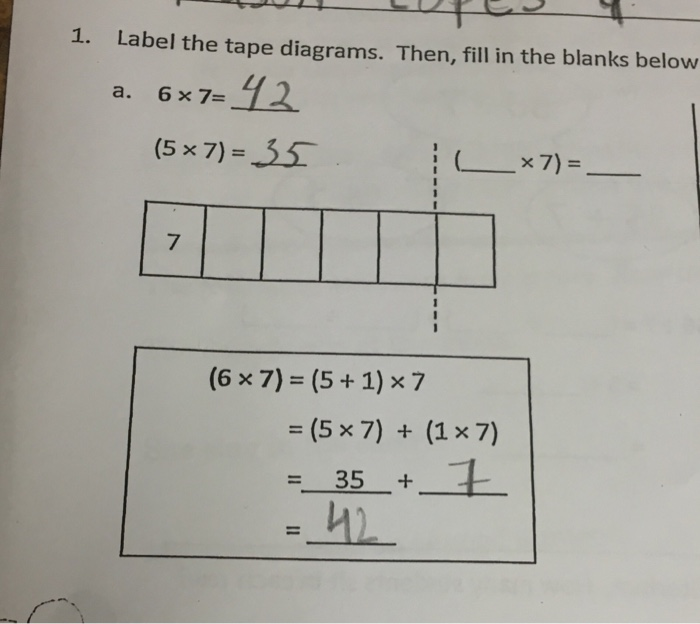
Solved label the tape diagram. then fiill in the blanks ...
6.1.2: Reasoning about Contexts with Tape Diagrams ...

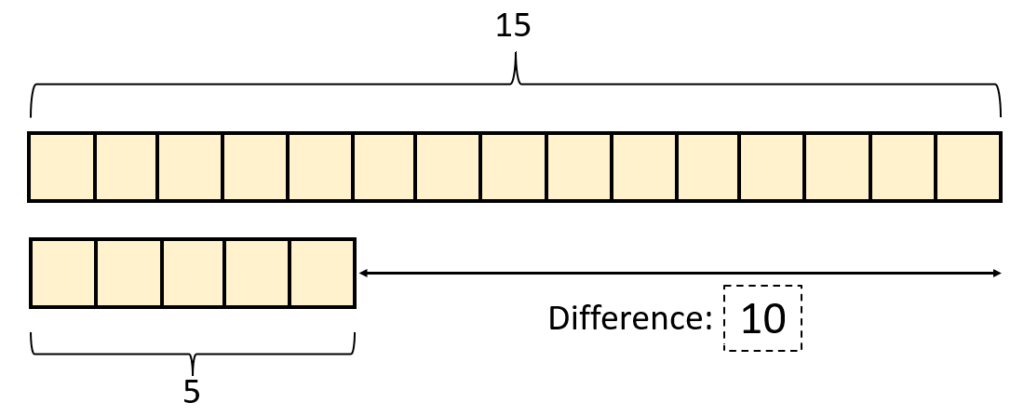
Comparison Problems: Using Tape Diagrams to Represent Math ...
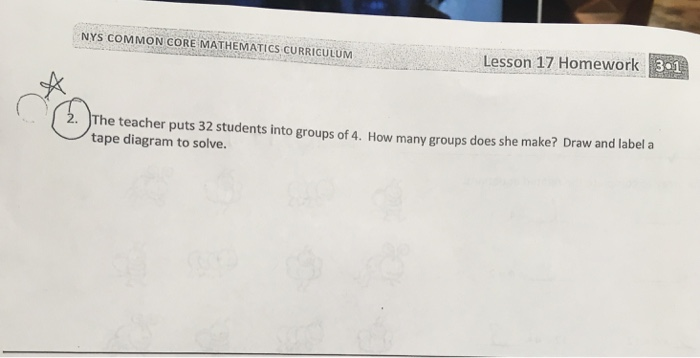
Solved NYS COMMON CORE MATHEMATICS CURRIGULUM Lesson 17 ...
6.1.3: Reasoning about Equations with Tape Diagrams ...
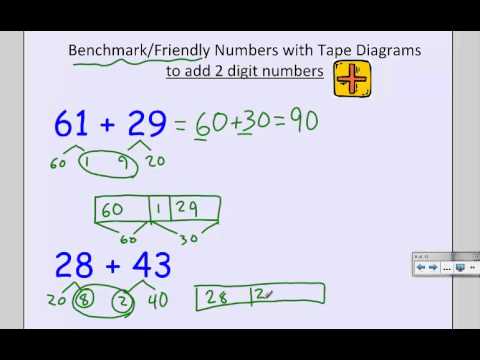
2nd Grade Friendly Numbers w_ Tape Diagram Addition and Subtraction

Solving word problems using tape diagrams – The Other Math

Tape Diagram:Converting Improper Fractions to Mixed Numbers ...
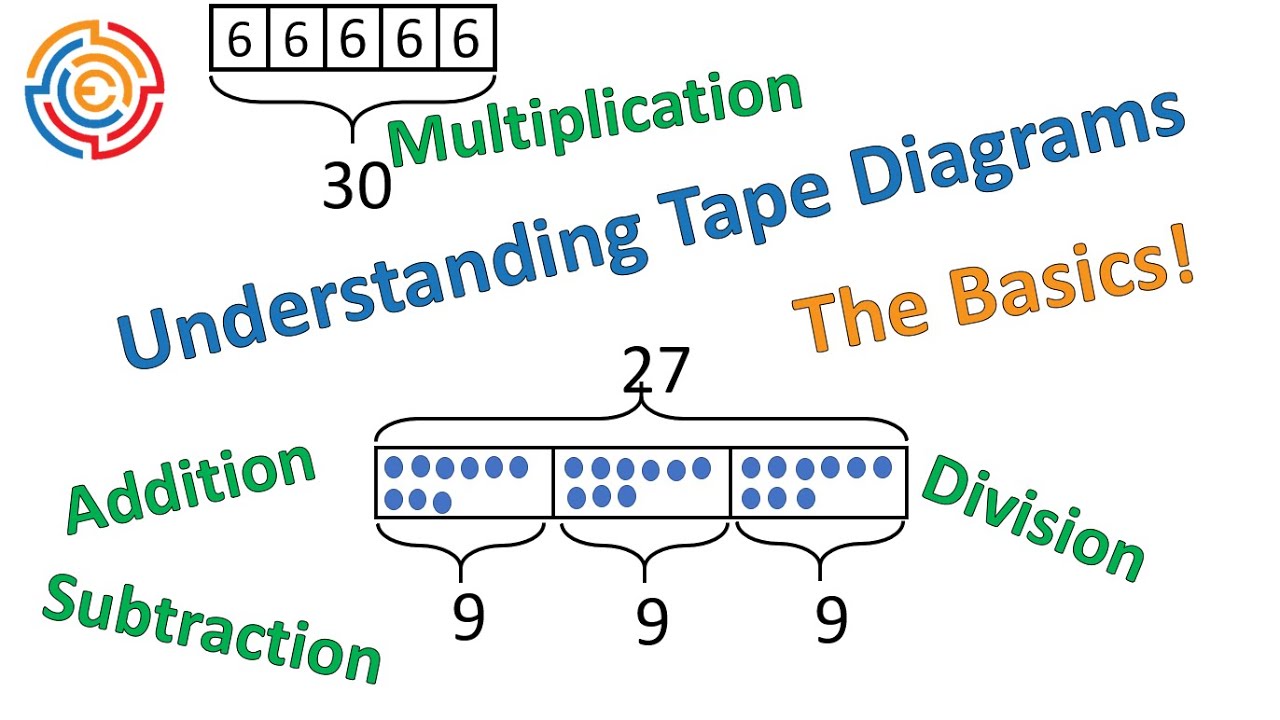
Understanding Tape Diagrams: The Basics!
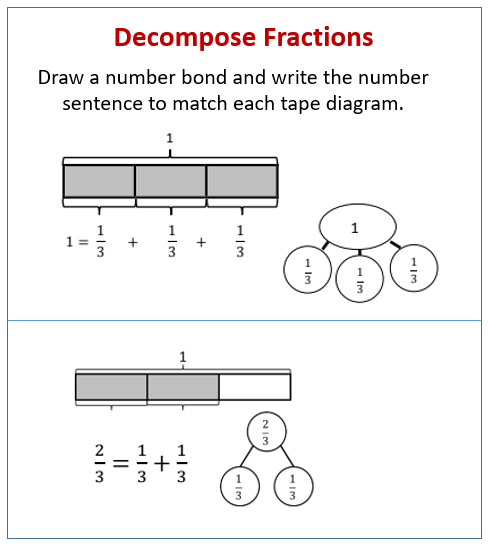
Decompose Fractions using Tape Diagrams (videos, homework ...

Addition and Subtraction Word Problems within 20 | Tape ...
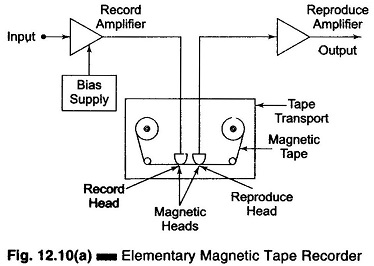
Magnetic Tape Recorder Working Principle | Basic Components
Coleman: To Solve the Problem Below, Try Using a Tape Diagram ...

How to Draw Division Tape Diagrams – Mighty Math Homework Help
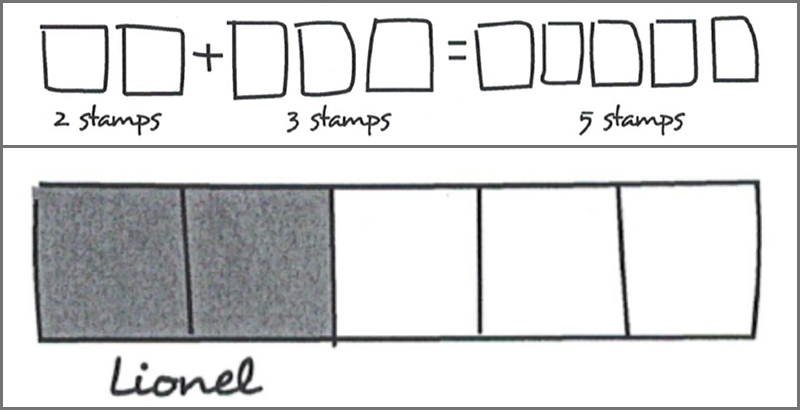
1st Grade Addition Strategy: Tape Diagrams

Tape Diagram Worksheets
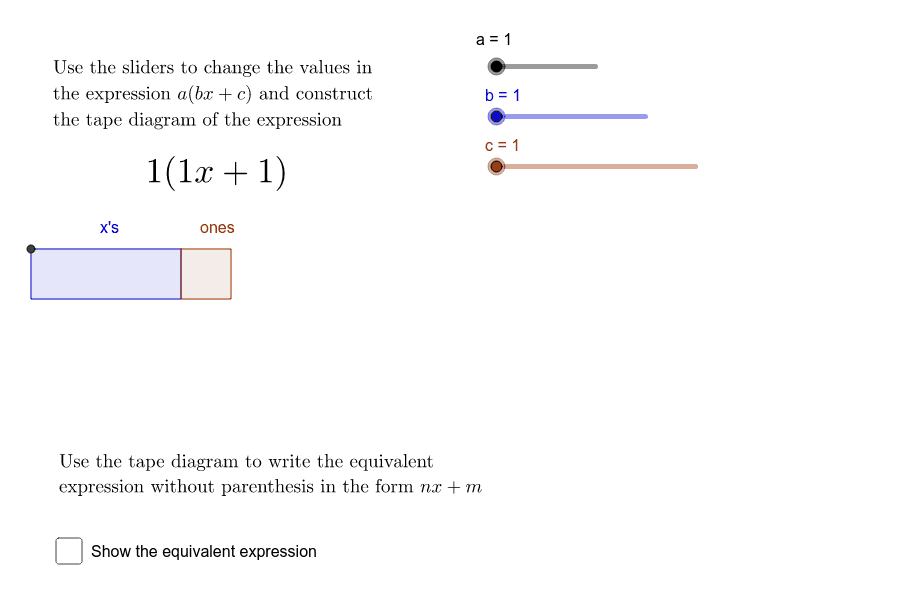
Tape Diagrams and Equations • Activity Builder by Desmos

Drawing Tape Diagrams to Represent Equations - YouTube

Tape diagrams can be used to help... - CK-12 Foundation
Using Tape Diagrams to Find the Whole From a Percent ...
Post a Comment for "42 draw and label tape diagram"